vscode c++远程调试实战
文章目录
在上两篇文章1,文章2中,我们介绍了c++开发的最佳实践,以及一些常见问题的解决方案。虽然笔者一直用vscode + remote-ssh + clangd阅读代码,但是调试代码时还是不免脱离vscode回到命令行,这多少让人有点分裂。因此本片文章介绍如何在vscode中进行c++远程调试。
环境准备
插件
本文章依赖以下插件
- remote-ssh,让vscode能够远程登陆远程开发机(我们的开发、编译、部署、调试都在这个环境中)
- clangd: 一款优秀的c++插件,功能完备,支持重构,跳转,自动补全等功能
- CodeLLDB: vscode调试器插件
其中remote-ssh和clangd的安装配置可参考我之前的文章
源代码
main.cpp
#include <iostream>
#include <vector>
#include <unistd.h>

int main(int argc, char *argv[])
{
    int i = 0;
    std::vector<int> v;
    while (1)
    {
        v.push_back(i++);
        ::sleep(1);
    }
    return 0;
}
CMakeList.txt
# Set the minimum version of CMake that can be used
# To find the cmake version run
# $ cmake --version
cmake_minimum_required(VERSION 3.5)

# Set the project name
project (demo)

# Add an executable
add_executable(demo main.cpp)
编译生成binary: main, 注意使用debug模式
cmake -DCMAKE_EXPORT_COMPILE_COMMANDS=YES -DCMAKE_BUILD_TYPE=Debug .
make
ll ./demo
调试新启动的进程
点击 Run and Debug , 选择create a launch.json file
Select Environment选择LLDB, 接着编辑launch.json文件
{
    // Use IntelliSense to learn about possible attributes.
    // Hover to view descriptions of existing attributes.
    // For more information, visit: https://go.microsoft.com/fwlink/?linkid=830387
    "version": "0.2.0",
    "configurations": [
        {
            "type": "lldb",
            "request": "launch",
            "name": "exec",
            "program": "${workspaceFolder}/demo",
            "args": [],
            "cwd": "${workspaceFolder}"
        }
    ]
}
上述配置中
- type表示调试工具,我们安装的插件是CodeLLDB, 所以选择lldb
- request有两种,launch和attach, 前者用于调试新启动进程,后者用于调试运行中进程。
- name: 对应着
Run And Debug窗口中的按钮名称,每个name对应着一组配置,用户可自定义 - args: 启动待调试program时的参数
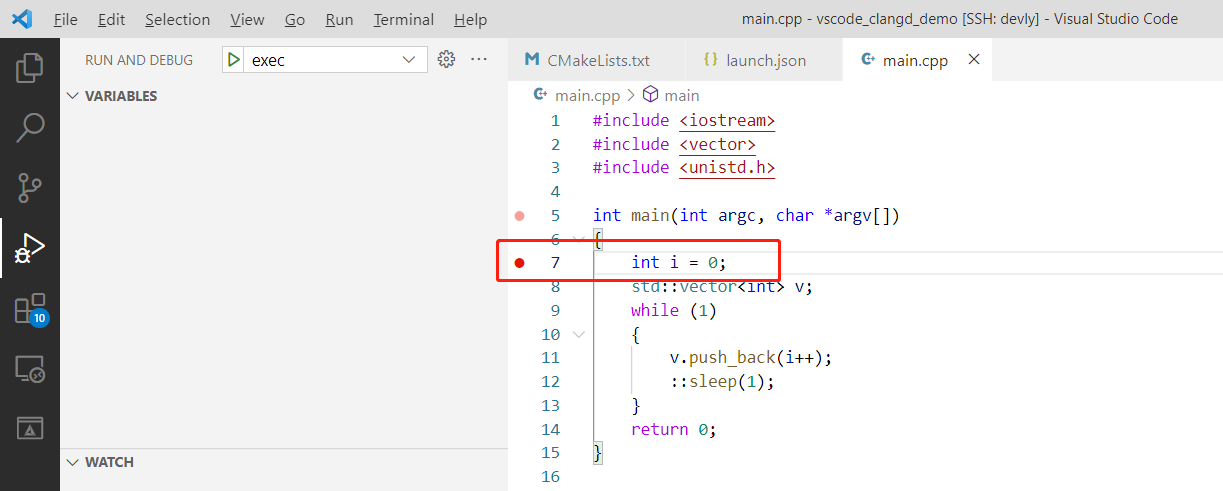
当完成编译,配置好launch.json文件后,便可开始调试了。首先在main函数上打个断点。
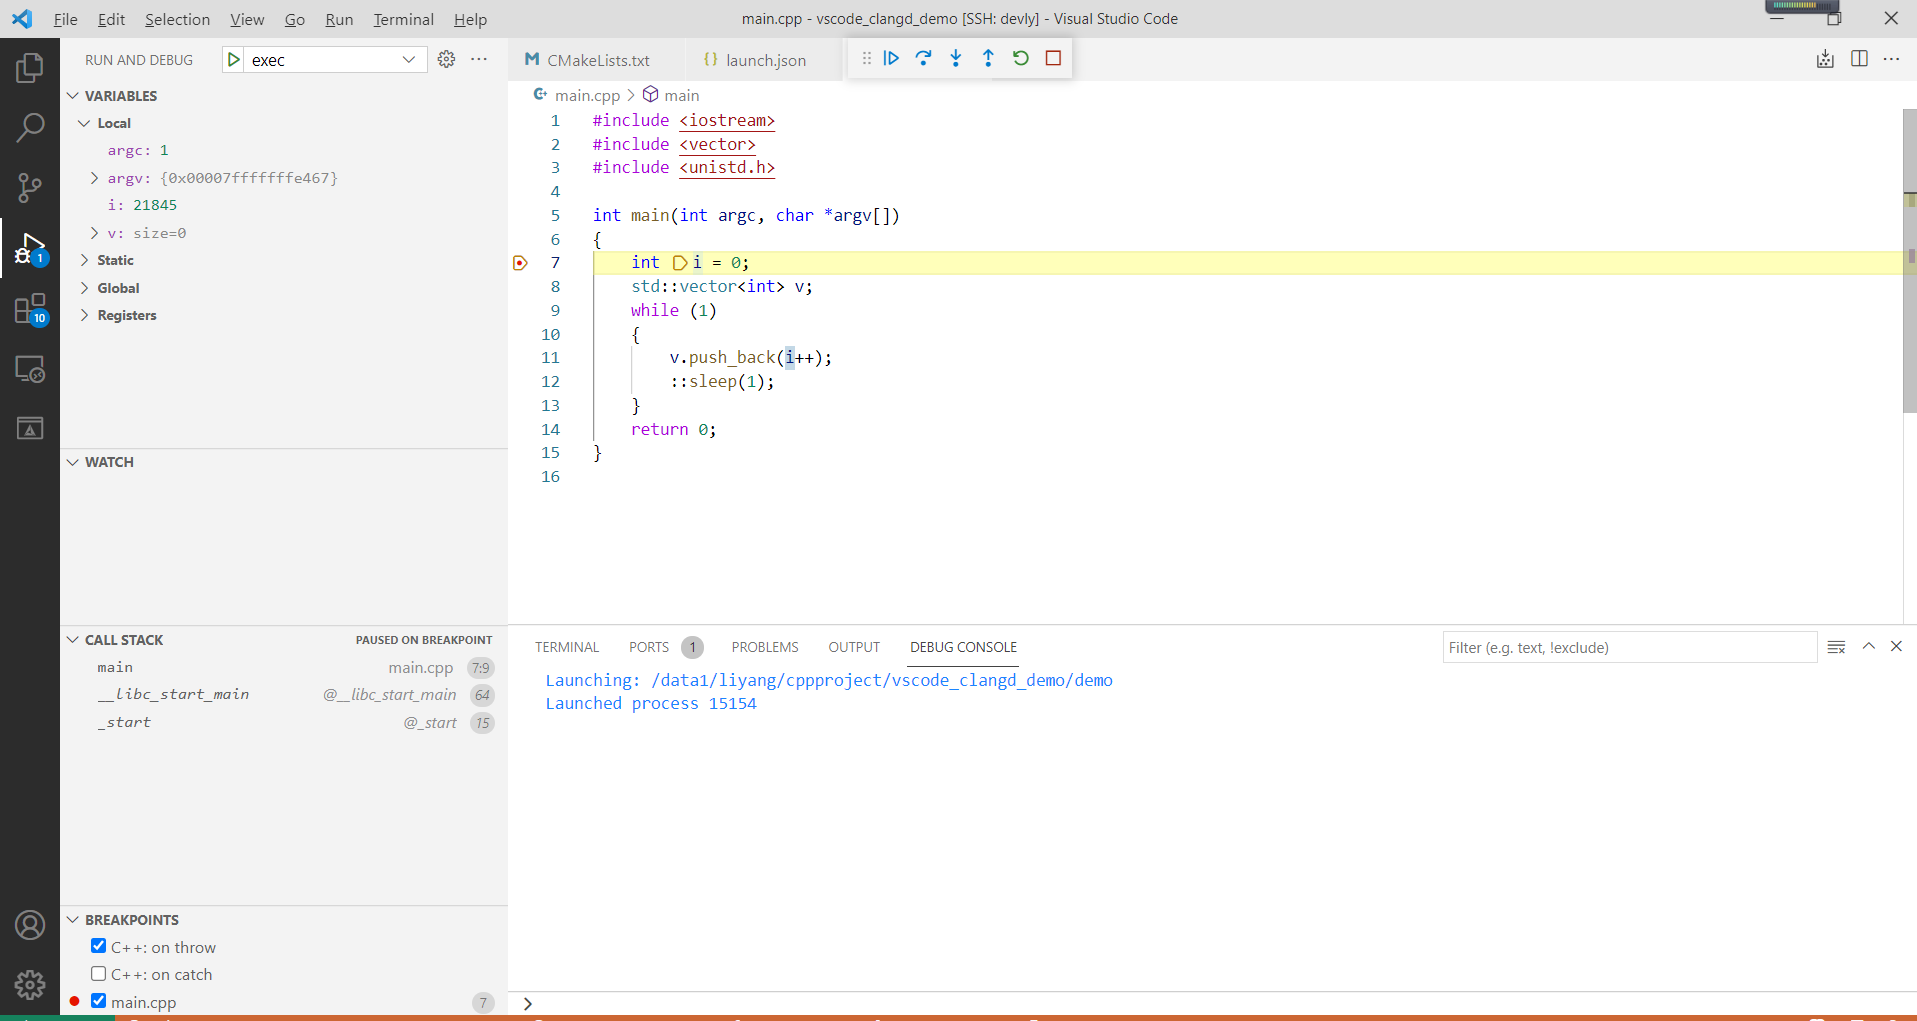
接着点击exec按钮,启动调试器,我们可以看到程序已经运行到断点。整体来说功能还是比较完备的,基本满足日常开发所需:左上角窗口显示了本地/静态/全局变量和寄存器状态。左下角窗口显示当前断点和call stack。正上方几个按钮对应continue/step over/step into/step out/restart/stop等功能。正下方窗口为lldb命令行,用户如果不习惯点来点去也可在此直接输入调试命令。
调试已有进程
在launch.json中新增一组配置
{
    "version": "0.2.0",
    "configurations": [
        {
            "type": "lldb",
            "request": "attach",
            "name": "attach",
            "program": "${workspaceFolder}/demo",
            "processId": "${command:pickProcess}",
            "cwd": "${workspaceFolder}"
        }
    ]
}
启动demo,并在后台运行:
nohup ./demo > nohup.log 2>&1 &
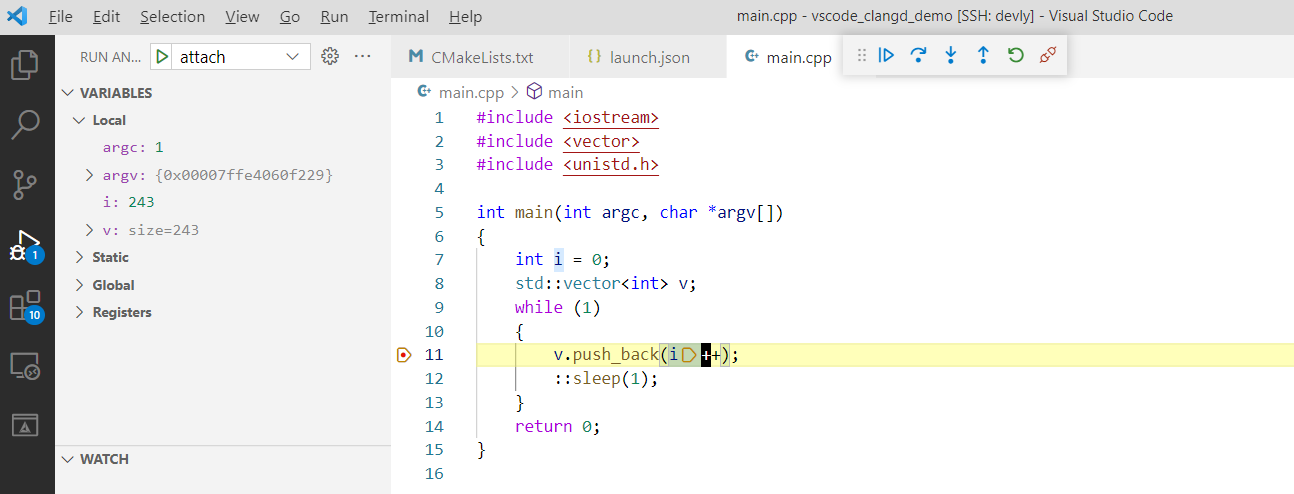
我们尝试attach到demo进程上调试,点击attach按钮,此时vscode会让我们选择要attach的进程。

输入正确的pid,打上断点,便可开始调试了。
调试coredump文件
c++程序员一定要有坦然接受程序随时coredump的觉悟。
首先修改main.cpp,引入一处致命错误
#include <iostream>
#include <vector>
#include <unistd.h>

int main(int argc, char *argv[])
{
    int i = 0;
    std::vector<int> v;
    while (1)
    {
        v.push_back(i++);
        ::sleep(1);

        if (i % 10 == 0)
            std::abort();
    }
    return 0;
}
执行ulimit -c unlimited, 编译运行之,果然出现了core
$ ./demo
[1]    18667 abort (core dumped)  ./demo
修改launch.json,新增配置后,launch.json变成现在这样
{
    // Use IntelliSense to learn about possible attributes.
    // Hover to view descriptions of existing attributes.
    // For more information, visit: https://go.microsoft.com/fwlink/?linkid=830387
    "version": "0.2.0",
    "configurations": [
        {
            "type": "lldb",
            "request": "launch",
            "name": "exec",
            "program": "${workspaceFolder}/demo",
            "args": [],
            "cwd": "${workspaceFolder}"
        },
        {
            "type": "lldb",
            "request": "attach",
            "name": "attach",
            "program": "${workspaceFolder}/demo",
            "processId": "${command:pickProcess}",
            "cwd": "${workspaceFolder}"
        }
        {
            "type": "lldb",
            "request": "custom",
            "name": "core",
            "initCommands": [
                "target create ${workspaceFolder}/demo -c ${input:coreFileName}"
            ]
        }
    ],
    "inputs": [
      {
        "id": "coreFileName",
        "type": "promptString",
        "description": "Enter core file path"
      }
    ]
}
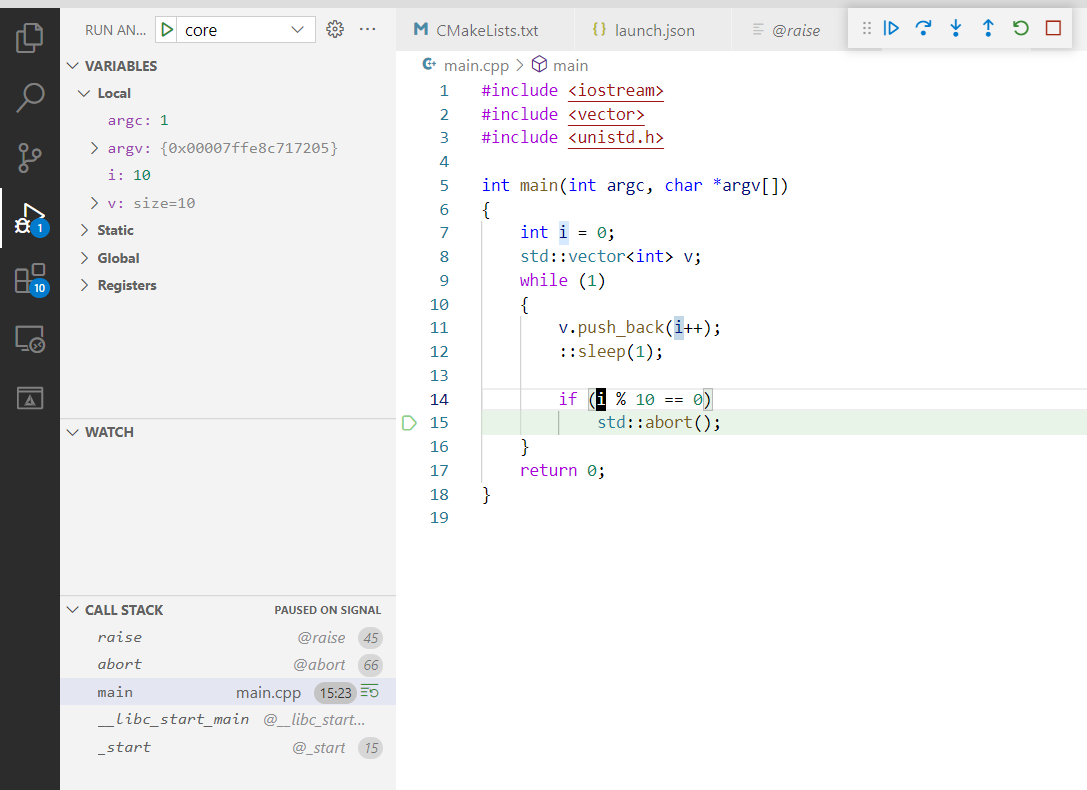
点击core按钮,输入core file path, 便可查看core时的现场
更多精彩内容,请关注微信公众号:后端技术小屋
推荐阅读
文章作者 后端侠
上次更新 2021-12-02